
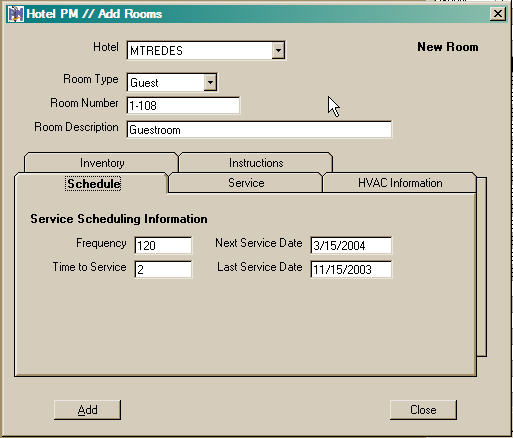
Begin the process of adding a room to the database by selecting the type of room that you wish to add. A drop down list provides a list of the available room types.
Meeting for meeting, conference, ball rooms, etc.
Guest for guest rooms or suites
Public for everything else
You must enter a unique room number for each room. This can be an actual number, as in Guest Rooms, or may be a name, frequently used for Meeting rooms, or it may be any combination of digits and characters, CL124 for a utility closet. The important thing is that each name must be unique.
You may also enter a longer description of the room. The description is often used to identify specific classes of rooms with in each room type.
The initial entry screen displays the Schedule Tab on which you provide basic information needed to schedule maintenance for this particular room. This includes Frequency of service in days. estimated Time required to to service this room in hours, the Next Service Date and optionally the last date this room was serviced. Once the Hotel PM system is operational the Next and Last service dates will be maintained by the system.
Before looking at the remaining items present on the Room data entry screen a few general operational about the general behavior of the Add Room command are in order. When Add is first selected from the Room List an empty data entry screen will be opened. This allows you to provide all or some of the data for this room. When you have completed data entry for this room click the Add button to save the information for the indicated room. The Add command will save your data and change to copy mode. The room ID is blanked but all other information entered for the room is carried over to a potential new room. This carry over process or Copy mode provides of rapid entry of similar rooms in a hotel.
In all there are five (5) tabs on the Room data entry form. These are Schedule, Service, HVAC, Inventory and Instructions. Each tap provides for the of data associated with this particular room. Only the data on the Schedule Tab, defined above is required. The remaining data is provided to smooth the performance of preventive maintenance for the room and to centralize information on the room in a single easy to access location.
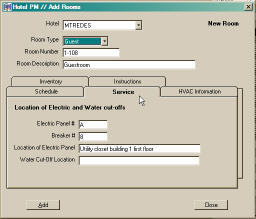
The Service Tab provides information on the location of electric and water service to the room. For electrical service you can provide the panel number or ID and the breaker number for the room. In addition a verbal description of where the electric panel is physically located can be provided. For water supply, the location of the cut-off valve is supplied. All of this information will be printed on each maintenance request for the room. This provides your maintenance personnel with easy access to these location should it be necessary to interrupt service while performing any indicated repairs.
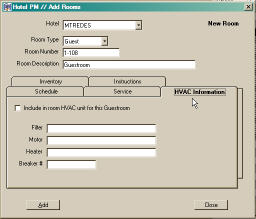
The next tab is the HVAC Information Tab. Similar to the Service Tab it provides for pertinent information on the room HVAC system. Specifically filter information, model and/or size, model for AC and Heater units and a breaker number for the HVAC equipment. This method of recording information about the room HVAC equipment assumes that the HVAC unit is serviced at the same time the room PM inspection is performed. This information will appear on each maintenance request generated for this room.
The Hotel PM an alternate method of handling In Room HVAC units (sometimes referred to as PTAC units.) By placing a check in the box at the top of the HVAC tab the program will create a special HVAC unit that is associated with this room. See the next figure for the HVAC tab when the Include in room HVAC unit box is checked.
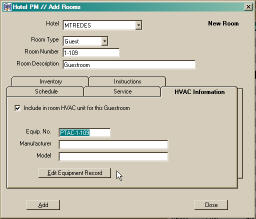
The maintenance of the In Room HVAC units is scheduled separately from the Room itself and independently of the other equipment in the hotel. A special scheduling function is provided for the In Room HVAC Units under the Schedule command. From the HVAC tab of the room record you can enter the manufacturer and model for the HVAC unit. Clicking the Edit Equipment Record button opens an equipment record that provides for the entry of all pertinent information about the In Room HVAC unit. The Room Setup Wizard has a special step that can create this special class of equipment (Room HVAC units ) when the guest rooms are generated.
When adding equipment you must click the Edit Equipment Record button and enter the essential data for the In Room HVAC unit. Be sure to activate the maintenance tasks for In Room HVAC unit when it is created from the Room record. The room record cannot be added to the room list until this has been done.
Removing the check from the Include in room HVAC unit box will cause the Hotel PM program to delete the record for the associated In Room HVAC unit from the Hotel database.
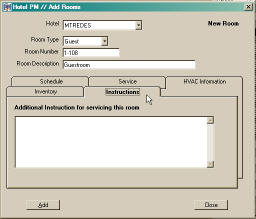
The Instruction Tab provides a text area in which specific instruction for performing preventive maintenance on this room can be entered. The system allows you to format this information in the manner which will best suit your needs. It can be entered as paragraphs, itemized action lists or a combination of the two. this information will appear on the maintenance request for the room.
It should also be noted that for room preventive maintenance the Hotel PM system provides for the creation of a detailed check list for each type of room. These check lists will also appear on each maintenance request. See the Room Check List commands under the System Menu for additional information on creating and printing of the room check lists.
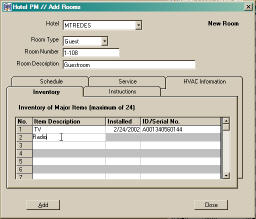
Finally there is the Inventory Tab. This tab provides a place to save an inventory list of up to twenty-four (24) items for this room. For each item you may enter a description, an installation date and a serial or id number as appropriate for the specific item. Inventory items can be as general or as specific as desired for your installation.